

Crochet Borders That Ripple or Pull In: Check the First Round
A border can change the shape of fabric that lay flat beforehand. If its edge begins to wave or draw inward, stop after the first affected round and inspect the placement.

Adding more rounds usually makes the original imbalance harder to correct. Start by checking the main fabric without stretching it. A border problem and an already uneven centre need separate attention. This guide uses US terms and focuses on diagnosing the foundation of an edging, not prescribing one border for every project.
Find where the shape first changes
Lay the piece on a flat surface. Compare the centre, each straight edge and the corners. Is the wave spread around the whole piece, confined to the row ends, or concentrated at a corner?
If the centre was already cupped or ruffled, return to its count and construction first. If it lay flat until the new border was added, inspect that border's stitch density and tension.
The curling guide helps distinguish an intentional shape, a tight foundation and a fabric that rolls. A border should not be used to hide an unresolved count error in the centre.
Take a note or your own photograph before undoing anything. Mark the affected section so you can compare a revised sample with the original placement.
Separate stitch tops from row ends
Across the top or bottom of a rectangular panel, the edging may work into existing stitch tops or foundation positions. Along its sides, you work across the ends of rows. Those are different structures.
One border stitch into every row end is not a universal rule. A tall row and a short row occupy different edge lengths, and the border stitch has its own width. Follow the pattern's ratio, then assess the actual fabric.
Along a row-end edge, identify stable insertion points rather than repeatedly using a large loose opening because it is easy to enter. Check for holes, split yarn and a line that shifts from the edge into the middle of the fabric.
The single crochet lesson explains the basic edging stitch often used for a foundation round. The double crochet lesson helps identify the taller row structures you may be edging.
Assess a ruffling straight edge
Too much border fabric for the length underneath can form waves. Check whether you placed extra stitches into some positions, repeated a corner group on the straight edge, or used a row-end ratio that is too dense for this sample.
Check the stitch size too. A looser border worked with a different hook or yarn can spread more than the centre. The total count alone cannot tell you how much edge length those stitches occupy.
Undo the affected section and test a measured adjustment. Keep the stitch method, yarn and hook consistent while changing the placement, or keep the placement fixed while comparing another suitable hook. Changing several things together makes the result difficult to interpret.
Assess an edge that pulls inward
Too little border length can gather the main fabric. Look for skipped positions, too few stitches along row ends, very tight loops or a finishing join that cinches the edge.
Do not immediately add stitches everywhere. First identify the section that lacks room. If only the side edges pull, the top-edge placement may already be suitable.
Check the active loop on the hook's shaft. Forming every loop tightly on the narrow throat can make the edging difficult to work into and shorter than intended. The gauge guide helps distinguish stitch size from the total number worked.
Treat corners as their own instructions
A corner changes direction. Its shaping may use several stitches in one position, a chain space or a more complex group. The appropriate treatment depends on the edging and corner angle.
Read where the corner begins and ends. Do not count the corner group again as the first full repeat on the next side unless the pattern says to. Mark the corner positions before working a long round. Openable markers or contrasting yarn scraps can identify them without becoming extra stitch positions.
If the straight sides lie well but the corners curl upward or flare outward, compare the corner instructions and placement first. One fixed corner formula will not suit every stitch height, border width or motif shape.
Check the decorative repeat before the next round
An edging repeat may require a particular number of positions on each side, with separate allowances for corners and partial edge repeats. Count the actual usable side positions under that convention.
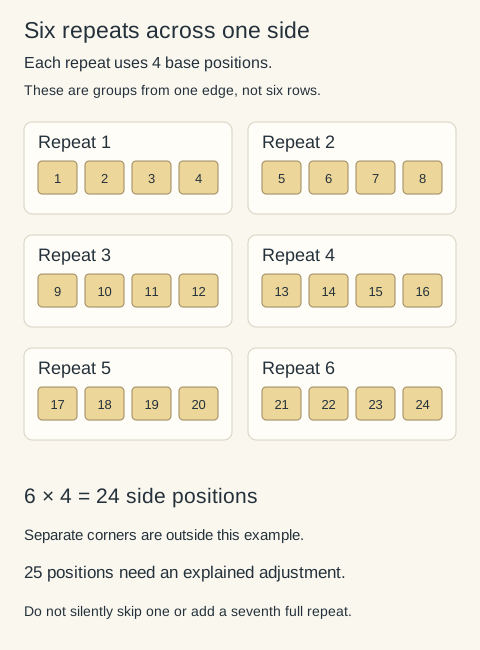
As a reading example, a repeat that uses four base positions fits six times into twenty-four available positions. A separate corner is not included in that arithmetic. If you have twenty-five side positions, neither silently skipping one nor adding a seventh complete repeat preserves the same arrangement.
Resolve the count using the border's adjustment instructions or choose a compatible edging. Do not let the need to fit a decorative repeat turn an otherwise flat foundation into an unexplained wave.
Finish after the foundation is settled
Finishing can help some fabrics relax, but stretching a border flat does not prove the placement is correct. Follow the yarn label and test the treatment first; the blocking and care lesson covers those choices.
Inspect the result after it has dried and settled. Record the successful placement by side and corner. A checked first round gives the remaining border a useful foundation; a forced-flat photograph does not.
Locking stitch markers
Openable markers help you find a stitch or the start of a round. A contrasting scrap of yarn works too.
Clover 3033 Quick Locking Stitch Marker SetView on AmazonYour next step
Keep making. Keep learning.
Separate stitch tops, row ends and corner allowances before changing the border placement.
Check the positions your border uses