

How to Work an Invisible Decrease in Amigurumi
By The Slow Stitch · Terminology: US Crochet Terms · Reading time: 4 min read · theslowstitch.com
A common invisible decrease gathers the front loops of two neighbouring single crochets, then closes them into one stitch. It can make a decrease less conspicuous on the intended outer face of amigurumi.
This lesson uses US single crochet, abbreviated sc. UK instructions call that stitch double crochet. Check the pattern's definition of inv dec: the abbreviation should describe the exact movement to use.
What You'll Learn
By the end of this tutorial you will be able to:
- Gather the front half-loop of each of two neighbouring bases
- Distinguish old base strands from newly drawn-up working loops
- Close the gathered strands before the final single-crochet pull-through
- Reduce a twelve-position practice round to eleven tops
What You Need
Smooth visible yarn for an unstuffed small spiral practice cup
A hook suited to the yarn, with enough room to see the gathered strands
A locking marker or contrasting yarn scrap, Scissors and a blunt yarn needle
Use the materials above for practice, adjusting the hook if needed for comfortable stitches. For a finished project, follow its pattern’s yarn, gauge and care requirements.
Abbreviations
| Abbr | Full Term |
|---|---|
| sc | single crochet (US) |
| inv dec | invisible decrease, using the front loops of two neighbouring stitches here |
| sc2tog | single crochet two stitches together (US), standard method distinct from this front-loop version |
Start with a counted spiral
For this practice, follow the magic-ring lesson to make six single crochets into a ring. Tighten the ring and secure its tail as directed there.
Work two single crochets in each of the six stitches for the next round, giving twelve stitches. Then work one plain round of twelve single crochets. Do not join these practice rounds with slip stitches or add beginning chains. Move a marker to the first stitch of each new round.
Before decreasing, count all twelve stitch tops and check that the intended outside face is facing out. This is a small technique sample, not a complete toy or a project with verified finished dimensions.
Find the two front loops
Look at the top V of the marked first stitch. Its front loop is the strand nearer you in the working position; its back loop is farther away.
Identify the front loop of the next stitch as well. The decrease uses those two neighbouring front loops. Do not gather two strands from the same V, and do not skip a stitch between them.
If the fabric is very tight, use a removable marker to identify the loops first. Pulling harder can stretch the wrong strand and make it difficult to see what you have caught.
Make the decrease
- Insert the hook under the front loop of the first stitch. Leave the back loop unworked.
- Without making a yarn over, pass the hook under the front loop of the next stitch too.
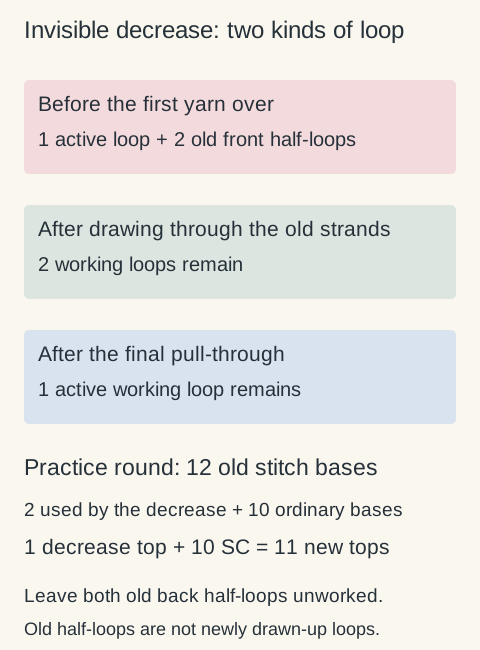
- Yarn over and draw that yarn through the two gathered front loops. Leave the original active loop on the hook; you now have two working loops.
- Yarn over and draw through both working loops to finish one single crochet decrease.
There is one active loop on the hook again. The two old bases now share one new stitch top.
Before the first yarn over, the hook holds the active loop plus the two gathered strands from the old stitches. Those gathered strands are not two newly drawn-up working loops. Keeping that distinction clear helps you follow the next pull-through.

Finish the eleven-stitch practice round
Move your round marker into the new top of the completed decrease. Work one ordinary single crochet into each of the next ten unused stitches.
You used 2 + 10 = 12 old stitches and made 1 + 10 = 11 new stitches. Stop at that total rather than making another decrease merely because the sample is beginning to change shape.
If you continue for a plain round, work one stitch into each of those eleven tops, including the marked top of the decrease. Do not work into the leftover back loops below as extra stitches.
 View diagram larger (opens in a new tab)
Compare it with standard sc2tog
A standard sc2tog draws up a working loop through each of two bases before the final pull-through. This invisible method gathers the two front loops first. It is a different insertion sequence, not just a tighter version of standard sc2tog.
The unused loops and the face of the fabric affect how the result looks. It may be more noticeable from the other side or in turned rows. Use the designer's chosen method rather than treating the word invisible as a guarantee.
If you still see a gap
Check that you caught the front loop of each neighbouring stitch and that the yarn was not split. Also look at the surrounding fabric: a large opening may reflect loose stitch formation or too much stuffing pressure rather than a missing special decrease.
Do not force in extra stuffing to assess this small sample. The amigurumi construction lesson discusses how shaping, fabric and assembly fit together. Use the counter to record completed rounds after checking the stitches themselves.
Ready for your next little make?
Keep learning with this free lesson, or explore complete crochet project PDFs in the shop, with materials, measurements, construction photos and finishing guidance.
What to Make Next
Three logical next steps to continue practicing:
Single Crochet Decrease: How to Work Sc2tog
Compare the standard both-loop sequence.
How to Increase in Single Crochet
Identify two tops sharing one old base.
Amigurumi Basics: Spirals, Shaping and a Practice Piece
Use the method specified for a complete shaping sequence.