

Left-Handed Crochet: Follow Written Patterns and Charts
Holding the hook in your left hand does not mean every pattern needs rewriting. Many instructions describe the next stitch in working order, so the count and operation stay the same.

Direction becomes important when the design contains a chart, lettering, an asymmetric shape or a specified physical side. Begin by separating those two kinds of information: what the stitch does and where the design needs it to appear. This guide uses US terms.
Keep stitch definitions and counts intact
“Two single crochets in the next stitch” still means two completed stitches sharing one base. It adds one to the total regardless of which hand holds the hook. “Single crochet two together” still combines two bases into one new top.
Likewise, do not translate US single crochet into a different stitch just because a demonstration is right-handed. US and UK terminology is a separate issue. The glossary helps with names; the single crochet lesson explains the underlying movement and count.
An instruction such as “next three stitches” normally follows your own working direction. An instruction naming the garment's left shoulder is describing a physical location. Those phrases need different treatment.
Check the direction of a demonstration
Ordinary left-handed rows usually progress from left to right, mirroring a right-handed row. Typical unturned rounds also travel in opposite directions. Check the demonstration's working face and handedness before following a left/right arrow.
Front loop and back loop still identify the nearer and farther strands of the top V in the current working position. They do not become each other merely because you use the other hand.
A mirrored teaching image can help you follow hand movements, but its printed labels may also be reversed. Keep an unaltered copy of the written instructions alongside it. Do not assume a flipped hook-size marking is a new sizing system.
Decide what the chart represents
A stitch-symbol diagram describes stitch placement. A colour grid describes units of colour under a stated construction. Read the legend, start marker, row numbers and arrows before choosing a direction. The chart-reading lesson explains those elements.
For a symbol diagram drawn for the opposite working direction, a mirrored reference may be useful. A graph showing the desired front-facing picture needs a coordinate plan that preserves that picture. Automatically mirroring the finished image can reverse lettering or a directional motif.
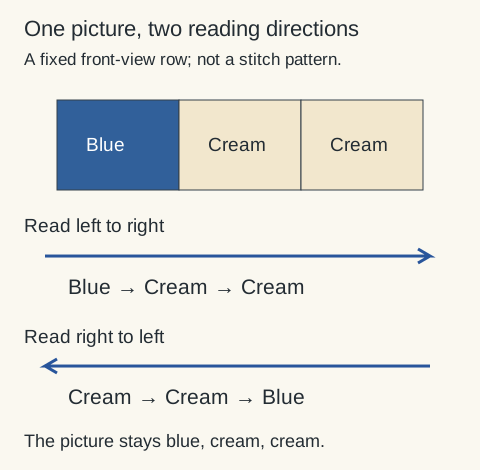
For example, suppose a front-view grid must show three cells from left to right as blue, cream, cream. A left-to-right working pass reads blue, cream, cream. A right-to-left working pass reads cream, cream, blue. Both descriptions can refer to the same fixed front-view row. Copying the other hand's colour sequence without checking direction can change the picture.
This is a reading example, not a universal first-row rule. Turning the fabric, working from another corner or using a chart with a different viewing convention changes the plan.
Check asymmetric shaping and placement
A symmetric plain rectangle can look much the same whichever hand made it. An angled opening, a cable leaning one way, a button band or a shaped sleeve can make the difference visible.
Read whether left and right mean the wearer's sides, the viewed photograph or the working edge. Mark pieces by the pattern's actual labels before joining them. Ask the designer when the location is unclear instead of changing an increase to a decrease to imitate a photograph.
The double crochet lesson can help you inspect posts and counted edges. A mirrored slope does not, by itself, prove a wrong stitch count.
Make a small directional check
Choose a short section containing the feature that matters: an off-centre colour block, a shaped edge or a crossing. Mark the intended front and the starting edge. Follow the planned reading direction and compare the result before making the full piece.
Record any authorised adaptation beside the exact row or chart. Keep the original instructions available so that changing reading direction does not accidentally change terminology, row numbers or counts.
The aim is a clear mapping between the written sequence, your working direction and the intended design. Handedness is one part of that mapping, not a reason to distrust every instruction you read.
Locking stitch markers
Openable markers help you find a stitch or the start of a round. A contrasting scrap of yarn works too.
Clover 3033 Quick Locking Stitch Marker SetView on AmazonYour next step
Keep making. Keep learning.
Separate the fixed picture from the order in which you work its stitches.
Check the chart’s key and construction