

Joining Crochet Squares: Choose a Seam for Your Blanket
The join becomes part of the blanket's fabric. It can leave a raised line, make a quieter connection or build a visible space between motifs.

Choose it before making the whole batch, while you can still check whether the square edges suit the method. If you are deciding how to join granny squares, begin with two correctly counted, finished squares. This guide helps you choose a seam, rather than giving one set of joining movements for every square.
Decide what you want the join to do
The classic granny square lesson explains one construction; another motif may have different stitches, spaces and corners.
Lay the squares in their intended orientation. Decide which faces will show and whether a visible seam is part of the design. A blanket is often seen from both sides, so inspect the reverse as well.
Think about the feel of the finished surface. A raised ridge may suit a textured blanket but feel different from a flatter sewn connection. A decorative join can be attractive precisely because it adds another line or colour; it does not need to be described as invisible to be useful.
Check the pattern's joining instructions before substituting. Some motifs are designed around a particular joining round or corner treatment.
Compare three common approaches
A sewn seam lets you connect finished squares with a yarn needle. Its appearance depends on which strands you catch and how the squares face each other. Whipstitch and mattress-style seams are different routes, not two names for one universal flat join. Keep the sewing yarn relaxed enough to preserve the edge length.
A crocheted seam uses a hook to connect corresponding edge positions. Slip-stitch and single-crochet joins differ in height and bulk, and their appearance also depends on loop selection and orientation. A slip stitch can still make a tight ridge if the loops are drawn small. The slip-stitch finishing lesson provides useful stitch and edge context.
Join as you go connects motifs during a specified round or section. It can reduce separate sewing, but requires a clear assembly order. It is not an instruction to replace every chain space with an improvised join. The pattern must define side connections, corners and places where several motifs meet.
Choose a method from its actual result in your sample, not from its name alone.
Count the edges before matching them
Identify the corresponding corners and count the usable positions along each edge. Keep chain spaces separate from individual chains unless the joining method treats them together.
The uneven-squares guide separates construction errors from correctly counted size differences. Check that distinction before choosing a seam to solve an unexplained mismatch.
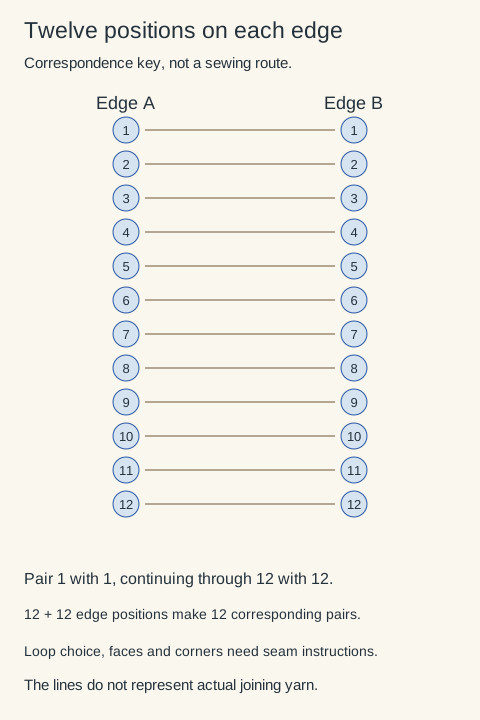
For a hypothetical one-to-one seam, mark twelve positions on each of two matching edges. The markers pair 1 with 1 through 12 with 12. That makes twelve paired positions, not twenty-four seam positions along one side. This example describes correspondence only; it does not define which strands to sew through.
If one edge has thirteen positions when the other has twelve, investigate before proceeding. You may have a count error, two different motifs or a pattern that expects a deliberately distributed mismatch. Do not hide the difference by pulling the seam tighter.
Make a joined pair before settling the dimensions
Use the intended yarn, hook or needle, loop choice and face orientation. Mark both corners so that the squares cannot drift out of alignment unnoticed.
After joining, lay the pair flat without stretching it. Look for gathering, a flare at the connection or one corner sitting above the other. Gently fold the pair in the way the finished blanket will move. Check that the seam is not restricting one edge while the square beside it stretches freely.
Measure the full pair. Two separate squares measuring 12 cm wide do not prove that every joining method will produce a 24 cm joined width. A join can add space, overlap edges or draw the connection inward. Record what your chosen method actually does.
Plan the intersections
A two-square sample does not show a four-square meeting point. If your layout has those intersections, make a small four-motif test before joining a large blanket.
Check whether the corner is used once or participates in more than one connection. Follow the method's order for crossing seams or corner joins. Repeatedly adding stitches to the same corner without a plan can create a lump; omitting a required connection can leave a hole.
Label a simple layout with rows and columns. Decide whether you will join strips first, connect one motif at a time or follow a specified join-as-you-go route. Leave tails accessible until the intersections and orientation are checked.
Finish and reassess the sample
Secure the ends and use the care-compatible finishing treatment planned for the blanket. The blocking and care lesson explains why that process must suit the yarn. Measure again after the sample has dried and settled.
Keep the joined sample alongside the square pattern. Record the loop choice, faces, materials and dimensions. That gives you a repeatable seam specification instead of a photograph that looks tidy but leaves the actual connection unclear.
Needle, scissors and finishing supplies
A blunt yarn needle and small scissors are useful for weaving ends and assembly. Choose the needle eye for your yarn and use scissors suited to cutting yarn. Store sharp tools safely.
Susan Bates 70773 Blunt Steel Yarn Needles, Size 16, Five-PackView on Amazon Jaasuee J5064 Embroidery Scissors with Protective Sheath, 3.62 InchesView on AmazonYour next step
Keep making. Keep learning.
Check each motif’s construction, count and finished size before choosing how the two edges should meet.
Compare the squares before joining