

Front Loop Only and Back Loop Only Crochet
By The Slow Stitch · Terminology: US Crochet Terms · Reading time: 6 min read · theslowstitch.com
The two strands at the top of a crochet stitch give you a choice of insertion points. Working through just one of them changes how the new row sits against the fabric below it.
This lesson uses US terminology and ordinary single crochet. The stitch movement stays the same; the loop you work through changes. In UK terminology, the stitch used here is double crochet.
The close-ups use coral working yarn against lilac fabric to separate the active loop from the old stitch being entered. They show local insertion points, not the complete counted sample. You can use one colour for the exercise.
What You'll Learn
By the end of this tutorial you will be able to:
- Identify front and back loops relative to the current working position
- Work single crochet under only one intact top strand
- Separate a captured base strand from newly drawn working loops
- Keep eight tops per row through both loop choices
What You Need
Smooth visible yarn for a small three-row sample; one colour is enough. The teaching close-ups use contrast yarn to separate new and old strands.
A hook suited to the chosen yarn, with comfortable space on its shaft
A removable marker or yarn scrap, if helpful, Scissors and a blunt yarn needle for finishing
Use the materials above for practice, adjusting the hook if needed for comfortable stitches. For a finished project, follow its pattern’s yarn, gauge and care requirements.
Abbreviations
| Abbr | Full Term |
|---|---|
| sc | single crochet (US) |
| ch | chain |
| BLO | back loop only |
| FLO | front loop only |
Find the two top loops
Hold the fabric ready to work the next row. Tilt its top edge towards you until you can see the line of Vs.
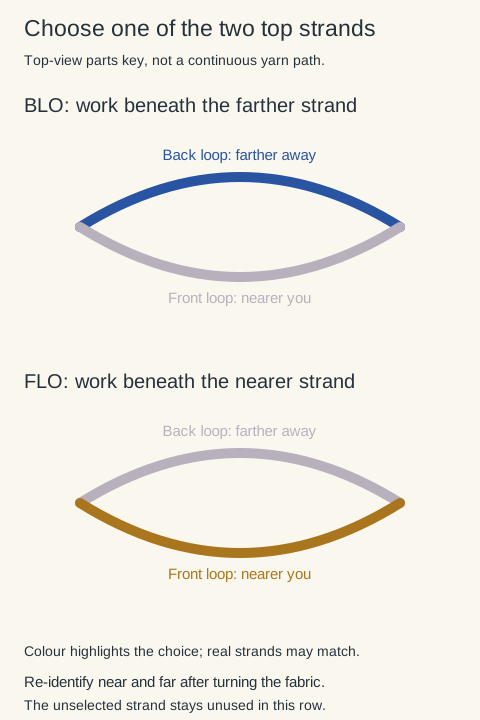
Each V has two strands. The one nearer you is the front loop. The one farther away is the back loop. These names refer to the top loops as the work is positioned for stitching. They do not mean the whole front or back face of your project.
Ordinary single crochet usually goes under both strands. For this practice, you will deliberately leave one strand unused.
 View diagram larger (opens in a new tab)
Prepare an eight-stitch sample
Chain nine. Starting in the second chain from the hook, make one single crochet into each remaining chain. Count eight stitches.
Chain one and turn. The turning chain does not count in this exercise, and you will not work into it at the end of the following row. Identify the first stitch's V before beginning.
Work a back-loop-only row
- Insert the hook beneath only the farther strand of the first top V. Leave the nearer strand below and in front of the hook.
- Yarn over and draw a new loop through that back loop. You have two working loops on the hook.
- Yarn over and draw through both working loops to complete one single crochet.
- Repeat in the back loop of each remaining stitch.
Before the yarn over, the old strand resting across the hook is part of the base stitch, not a newly drawn working loop. You still have one active loop. The count becomes two only after you draw the new yarn through that selected strand, then returns to one after the final pull-through.
Count eight completed stitches. Using one top loop instead of two does not itself increase or decrease the count.
Look at the row you worked into. The unused nearer strands form a visible line. Do not mistake that line for the new row's top edge: the eight new Vs sit above it.

Work a front-loop-only row
Chain one and turn again. Find the new working edge, then identify the nearer strand of its first V.
Insert the hook under that front loop only. Yarn over, draw up a loop, yarn over and draw through both loops. Continue in the front loop of every stitch across.
Again, count eight stitches. Compare how the unused strands appear on the two faces of your sample. Turning changes which face is towards you, so identify the front and back loops afresh each row rather than following a fixed colour or face label.

Count the three rows
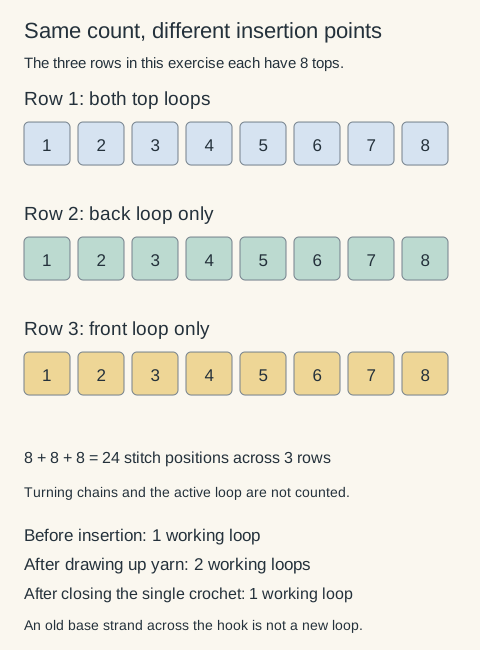
The first three rows contain eight stitch tops each: eight ordinary single crochets, eight BLO single crochets and eight FLO single crochets. That gives twenty-four positions across the three rows, with no increase from changing the insertion point. The turning chains and active loop are outside those totals.
 View diagram larger (opens in a new tab)
Finish and inspect the three rows
After row three, fasten off and secure the tails using the finishing lesson. Let the fabric rest before inspecting the unused strands and the three rows of tops. A marker or contrasting yarn scrap can help you find the actual upper edge without counting an unused lower strand twice.
Use the stitch-anatomy lesson if the top V is hard to distinguish from the stitch body. Follow the care instructions for the yarn before comparing a finished sample's texture. This short mixed-loop exercise does not establish the stretch, recovery or dimensions of a full ribbed band.
What the abbreviations mean
Sc BLO means single crochet in the back loop only. Sc FLO means single crochet in the front loop only. A pattern may apply the instruction to one stitch, one row or the rest of a section. Read how long the instruction lasts.
If the following row returns to ordinary single crochet, work under both top loops unless the pattern states another insertion point.
Back-loop rows can create ridges and are used in several ribbing methods. The stretch and recovery depend on the yarn, stitch, gauge and direction of construction. A loop choice alone does not guarantee that a band will fit a wrist or hat.
Avoid catching the wrong strand
If the hook passes under both strands, you have made an ordinary single crochet rather than the specified loop-only version. If it splits the yarn, back out and insert beneath the intact strand.
Half double crochet has an additional strand often called its third loop. That is a different insertion point from the back loop of the top V. A third-loop pattern needs its own directions.
Keep the loops large enough to work into comfortably. Stretching a single strand to force the hook through can distort the sample and make the next row harder to read.
For the basic movement, revisit single crochet. When a pattern uses unfamiliar placement abbreviations, check its notes alongside the glossary. Mark your completed row in the counter, then confirm the eight stitches in the fabric.
Ready for your next little make?
Keep learning with this free lesson, or explore complete crochet project PDFs in the shop, with materials, measurements, construction photos and finishing guidance.
What to Make Next
Three logical next steps to continue practicing:
Single Crochet: The Foundation Stitch for Every Project
Compare the ordinary both-loop insertion and counted row.
Half Double Crochet: The Most Versatile Middle Stitch
Distinguish its third loop from the two strands of the top V.
Moss Stitch (Linen Stitch): The Most Satisfying Woven Texture
Compare working into a chain space with working into a top loop.