

How to Crochet a Slip Stitch
By The Slow Stitch · Terminology: US Crochet Terms · Reading time: 5 min read · theslowstitch.com
A slip stitch moves the active loop into a new position with very little added height. It is useful for joining a round, travelling across stitches and making certain seams or textures.
This lesson teaches the basic movement into an existing stitch. It uses sl st, an abbreviation you may also see written as ss. The stitch has the same name in US and UK terminology, but follow the abbreviation key in your own pattern.
What You'll Learn
By the end of this tutorial you will be able to:
- Insert beneath both top loops of the intended base
- Continue the caught yarn through the original loop without another yarn over
- Practise four slip stitches without counting the active loop as a stitch
- Find the joining target named by a round pattern
What You Need
A small smooth-yarn single-crochet sample with at least four available stitch tops; the lesson also gives a four-stitch setup
A hook suited to the sample yarn, with room for the active loop on its shaft
A removable stitch marker or contrasting yarn scrap, if helpful
Use the materials above for practice, adjusting the hook if needed for comfortable stitches. For a finished project, follow its pattern’s yarn, gauge and care requirements.
Abbreviations
| Abbr | Full Term |
|---|---|
| sl st / ss | slip stitch |
| sc | single crochet (US) |
| ch | chain |
Start with a small piece of crochet
Use a counted row of ordinary single crochet in smooth yarn, and leave the active loop on your hook.
For this short movement exercise, use the first four available stitch tops. Make no turning chain. You are practising four slip stitches, not starting a full project or establishing a rule for every slip-stitch fabric.
If you need a base, make five chains and work a single crochet into the second chain from the hook and each remaining chain. That creates four single crochet stitches to practise on.
After completing the base row, turn once so you can work back across its tops. If your existing sample is already turned and ready for its next row, do not turn it again. Identify the first stitch at the working edge before inserting.
Make one slip stitch
- Find the first stitch's top V. Insert the hook beneath both strands.
- Yarn over and catch the working yarn.
- Draw that yarn through the base stitch and through the active loop that was already on the hook.
One active loop remains. The slip stitch is complete. Do not make an extra yarn over and pull-through after this, as you would when finishing a single crochet.
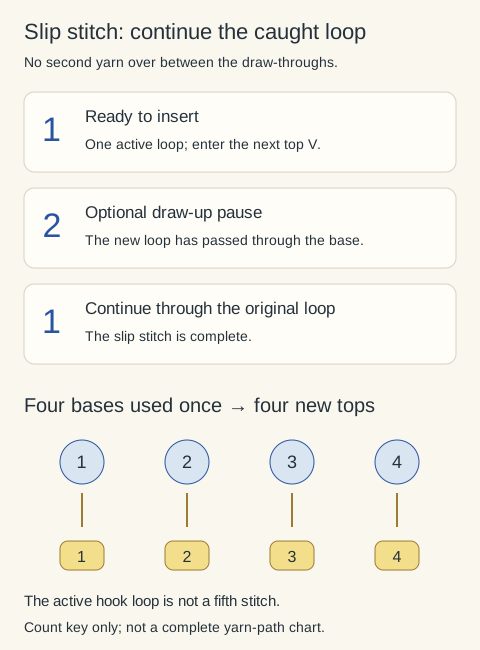
You may find it easier to think of the draw-through in two stages: bring the caught yarn through the base, then continue through the original loop. Keep the strand caught without adding another yarn over between those movements.

Repeat without tightening the edge
Move to the next unused stitch and make another slip stitch. Continue until you have worked into all four base stitches once.
Let the new active loop rest on the hook's shaft. It is easy to tighten it around the narrower throat and then struggle to pass the head through on the next stitch.
After each stitch, gently spread the little strip of fabric. If it draws in sharply, check your grip and loop size. A tidy-looking but very tight slip stitch can be difficult to work into later.

Check the four positions
You have used four base stitches and made four slip stitches. Each new top sits close to the old edge, so use a marker if it is hard to distinguish the final stitch from the active loop.
This exercise does not add a single crochet above every base. The fabric will look and feel different because the slip stitches have much less height.
If you accidentally made a single crochet, you will have drawn up a loop, made another yarn over, then drawn through two loops. Undo that stitch if the instruction calls for a slip stitch.
 View diagram larger (opens in a new tab)
Joining a round uses the same movement
When a pattern asks you to join, identify the precise target before inserting the hook. It might be the first stitch or a particular chain of a counted starting chain. Those are different locations.
Make the slip stitch through that target and the active loop. Do not automatically count the join as an extra stitch, and do not work into it on the next round unless the pattern tells you to. Marking the first counted stitch can help you avoid an accidental increase.
The granny square lesson gives you a joined-round example. Its instructions state where the join belongs.
Moving along an edge is different from fastening off
A slip stitch leaves an active loop on your hook. By itself, it does not secure a cut yarn end. When you have finished a project or colour section, follow its fastening-off and tail-securing directions.
See slip-stitch finishing for finishing context. If a basic stitch keeps turning into the wrong movement, compare it slowly with single crochet: the difference is the draw-through sequence, not how firmly you pull.
Ready for your next little make?
Keep learning with this free lesson, or explore complete crochet project PDFs in the shop, with materials, measurements, construction photos and finishing guidance.
What to Make Next
Three logical next steps to continue practicing:
Single Crochet: The Foundation Stitch for Every Project
Compare the additional yarn over that closes a single crochet.
Classic Granny Square: The Step-by-Step Method
Use slip stitches in a round with a stated joining target.
Slip Stitch and Invisible Finishing: Neat Edges and Seams
Distinguish moving the active loop from fastening off.